M.2 saga with MSI B150 PC MATE
I decided to build a new machine for my kids so I purchased an MSI B150 PC MATE motherboard and evaluated my options for a hard drive. Since it supported the newer M.2 SSDs, I figured I'd splurge.
First mistake: somewhat novice with the M.2 form factor, I didn't realize it supported both SATA and PCIe with no visible distinction. I researched various M.2 drives and picked a WD Black PCIe before realizing that the MSI B150 PC MATE only supports M.2 SATA, not M.2 PCIe drives. Doh!
Fortunately there's an adapter to so solve that problem, although it will use up a PCIe 3.0 x4 connector on your motherboard. For that reason I recommend you return the motherboard for an M.2 PCIe-compliant board (like H170A PC MATE) or return the PCIe drive and get an SATA equivalent.
However, I like a challenge ;) so I forged ahead with the adapter!
Second mistake: My kids need Windows for certain programs and my only copy is Windows 7. Unfortunately Windows 7 and NVMe drives (like M.2) don't get along.
According to Intel:
"Windows 7 does not support native UEFI booting without a Compatibility Support Module [CSM]. As a result, system compatibility is limited and varies by vendor. In order to properly boot Windows 7 from an NVMe SSD, your system must support loading UEFI drivers when the Compatibility Support Modules is enabled."Bottom line: use Windows 8.1 or later.
However, I like a challenge ;) so I forged ahead with Windows 7!
This is possible because the MSI B150 PC MATE supports
- UEFI, which requires a Windows 7 DVD in an optical drive -- i.e. you cannot install Windows 7 with a USB stick (press Delete on startup > BIOS > Boot > Boot Mode Select -- set it to LEGACY+UEFI)
- CSM (press Delete on startup > BIOS > Advanced > Windows OS Configuration > Windows 7 Installation -- set it to enabled)
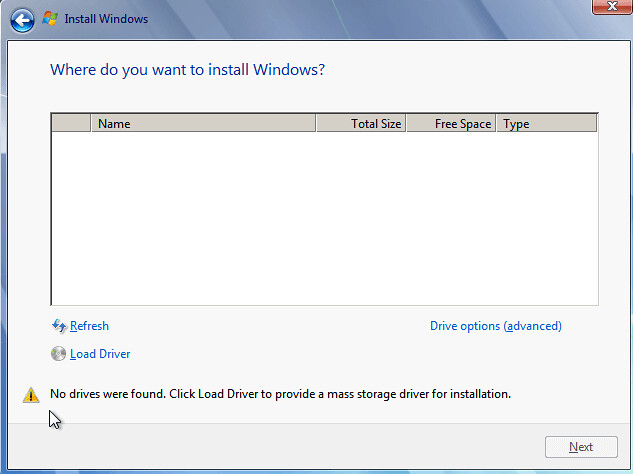
Now, if you boot from the Windows 7 DVD you'll see the familiar Windows setup wizard and feel all warm and fuzzy until you get to the screen above where no drives are listed. Arghh!
Third mistake: After searching the all-powerful Internet for a ridiculously long time, I finally broke down and did what no man likes to do: read the manual.
Buried on page 4 is this crucial lead:
"Microsoft Windows 7 installation on NVMe devices that use the PCIe bus requires a Hotfix. Use this Microsoft KB Article for assistance: KB 2990941"
That article provides an 11-step "Method 1" process that involves slipstreaming the hotfix into a custom Windows 7 ISO and burning a new DVD. Sigh... Good thing I like a challenge ;)
FYI, if you're not in the mood to go through all the tedious steps, you can download the final ISO here.
Note: the first step in that article mentions "Windows 8.1" but it is the correct link and software needed for Windows 7. The Internet installation of the Windows ADK also takes quite a while to load the initial install screen so be patient and wait up to 10 minutes before assuming the install is frozen.
Note: step 3 means copy everything from your Windows 7 installation cd to the c:\temp\src folder (not just the 'sources' folder).
Note: you can ignore step 5 since we don't need additional drivers, just the hotfix.
If you get an "Error: 87 The mount-image option is unknown", use the following commands instead of those provided in step 7:
dism /Mount-Wim /WimFile:c:\temp\src\sources\boot.wim /Index:1 /MountDir:c:\temp\mount
dism /Image:C:\temp\mount /Add-Package /PackagePath:c:\temp\hotfix
dism /Unmount-Wim /MountDir:C:\temp\mount /Commit
dism /Mount-Wim /WimFile:c:\temp\src\sources\boot.wim /Index:2 /MountDir:c:\temp\mount
dism /Image:C:\temp\mount /Add-Package /PackagePath:c:\temp\hotfix
Manually sort the folder C:\temp\mount\sources by date, and then copy the updated files to c:\temp\src\sources.
dism /Unmount-Wim /MountDir:C:\temp\mount /commit
If you get an "Error: 87 The mount-image option is unknown", use the following commands instead of those provided in step 9:
dism /Mount-Wim /WimFile:c:\temp\src\sources\install.wim /Index:1 /MountDir:c:\temp\mount
dism /Image:C:\temp\mount /Add-Package /PackagePath:c:\temp\hotfix
dism /Mount-Wim /WimFile:c:\temp\mount\windows\system32\recovery\winre.wim /Index:1 /MountDir:c:\temp\winremount
dism /Image:C:\temp\mount /Add-Package /PackagePath:c:\temp\hotfix
dism /Unmount-Wim /MountDir:C:\temp\winremount /Commit
dism /Unmount-Wim /MountDir:C:\temp\mount /Commit
Before you can run step 10, install Oscdimg. Then use the Legacy and UEFI BIOS multiple Boot mode option.
Whew! After all that mess, and burning the ISO to a DVD, I was able to boot Windows 7 on my PCIe M.2 drive!!
...next challenge: getting a Linux dual-boot setup (since Grub and LILO apparently don't like NVMe either)
________________
...next challenge: getting a Linux dual-boot setup (since Grub and LILO apparently don't like NVMe either)
________________
Update: I finally got Linux dual-boot to work!
Fourth mistake: I was selecting the normal DVD-ROM entry in the BIOS boot list instead of the "UEFI: " prefixed entry for the same DVD-ROM. Because of this, Lubuntu was booting in "Legacy" mode and couldn't see the Windows OS in "UEFI" mode. Once I booted the Lubuntu LiveCD using the UEFI entry in the BIOS boot options, it saw the existing Windows install and automatically configured Lubuntu to boot alongside Windows.
...Unfortunately, after Lubuntu finished installing and the machine rebooted, Windows automatically booted. Arghh!
After some trial and error, I finally discovered if I loaded the BIOS boot list I could see an entry for "ubuntu" and that loaded GRUB which then displayed both ubuntu (Lubuntu) and Windows as boot options.
I wanted to avoid entering the BIOS boot screen every time I wanted to load Linux so I dug a bit further and finally discovered a setting buried in the BIOS which allowed me to set the "ubuntu" option as default: BIOS > Boot > UEFI Hard Disk Drive BBS Priorities
Now that GRUB was loading by default, I just had to edit /etc/default/grub to change GRUB_DEFAULT=2 to load my Windows option by default and I'm a happy camper :)


Comments
Post a Comment
Keep it clean and professional...